Your cart
Your cart is empty
Continue shoppingDrawer menu

Last Updated: September 17, 2026
Learning how to cleanse crystals for beginners step by step starts with one honest truth: most damage happens in the first five minutes, not the first five months. Beginners grab a raw malachite cluster, run it under the tap, and watch a soft stone pit and dull within seconds. This guide from DP Online Syd walks you through each method in order, flags which stones must stay dry, and shows you how to reset a piece without harming it.
Crystal cleansing is the practice of clearing accumulated energetic residue from a stone using water, light, smoke, sound, or salt so it can be recharged with fresh intention. Think of it as spiritual hygiene: a reset rather than a repair.
Before you begin, gather a few basics:
Skip metal bowls for salt water, which corrodes over time. Ceramic or glass keeps the process simple and safe.
Match the method to the mineral, not the mood. A stone's hardness, porosity, and chemical solubility decide everything: whether it tolerates submersion, sunlight, salt, or only a dry method like sound. Getting this step right prevents the permanent damage that beginners most often cause.
The Mohs hardness scale runs from 1 (talc) to 10 (diamond). Stones below 6 scratch easily and often absorb water, while porous or water-soluble minerals react badly to submersion. Hardness alone is not the whole story, though. Two stones can share a Mohs rating and behave completely differently in water:
A stone can be hard and still water-sensitive. Pyrite sits around 6 to 6.5 on the scale, yet it rusts and tarnishes when wet because of its iron content. That is why the matrix below combines hardness with a water-safety verdict rather than relying on the scale alone.
| Stone | Mohs Hardness | Water-Safe? | Sun-Safe? | Best Method |
|---|---|---|---|---|
| Clear quartz | 7 | Yes | Yes | Water, sunlight, sound |
| Amethyst | 7 | Yes | Fades in prolonged sun | Moonlight, sound, smoke |
| Selenite | 2 | No | Yes | Moonlight, sound, selenite slab |
| Malachite | 3.5-4 | No | Yes | Smoke, sound |
| Pyrite | 6-6.5 | No | Yes | Smoke, sound, dry salt |
| Rose quartz | 7 | Yes | Fades in prolonged sun | Water, moonlight |
| Halite (rock salt) | 2.5 | No | Yes | Sound, dry salt |
| Fluorite | 4 | No | Fades in sun | Moonlight, sound, smoke |
| Citrine | 7 | Yes | Yes | Sunlight, water, sound |
| Carnelian | 6.5-7 | Yes | Yes | Sunlight, water, sound |
Treat this matrix as your first filter. If a stone sits below 6 on the scale, if the word "water-soluble" applies, or if it contains iron or another reactive metal, choose a dry method.
If you are unsure, work through these questions in order:
When none of the answers rule a method out, pick the gentlest option that still feels meaningful to you. Moonlight and sound are the two universal fallbacks that suit almost every stone.
Crystal pendants, rings, and bracelets combine a stone with metal, adhesive, or a plated finish. The weakest material sets the limit, not the strongest. A hard quartz set in sterling silver still cannot go in salt water, because the salt attacks the silver even when the stone would survive. For these pieces, dry methods such as sound, smoke, or moonlight are the safe default, and the metal is best cared for separately with a dedicated polish.
Most beginner guides jump straight to the methods and treat safety as a footnote. In practice, the choice of method is the only decision that can cause irreversible harm. A stone that pits, dissolves, or rusts cannot be restored by any later cleanse or charge, so the two minutes spent checking hardness and porosity protect years of use. Once you know your stone's limits, every method that follows becomes a matter of preference rather than risk.
Running water is the fastest reset for hard, non-porous stones. Hold the crystal under a gentle flow for one to two minutes, visualising the water carrying away energetic debris. Keep the stream cool, not hot, and dry the stone fully with a microfibre cloth afterwards to prevent water spots.
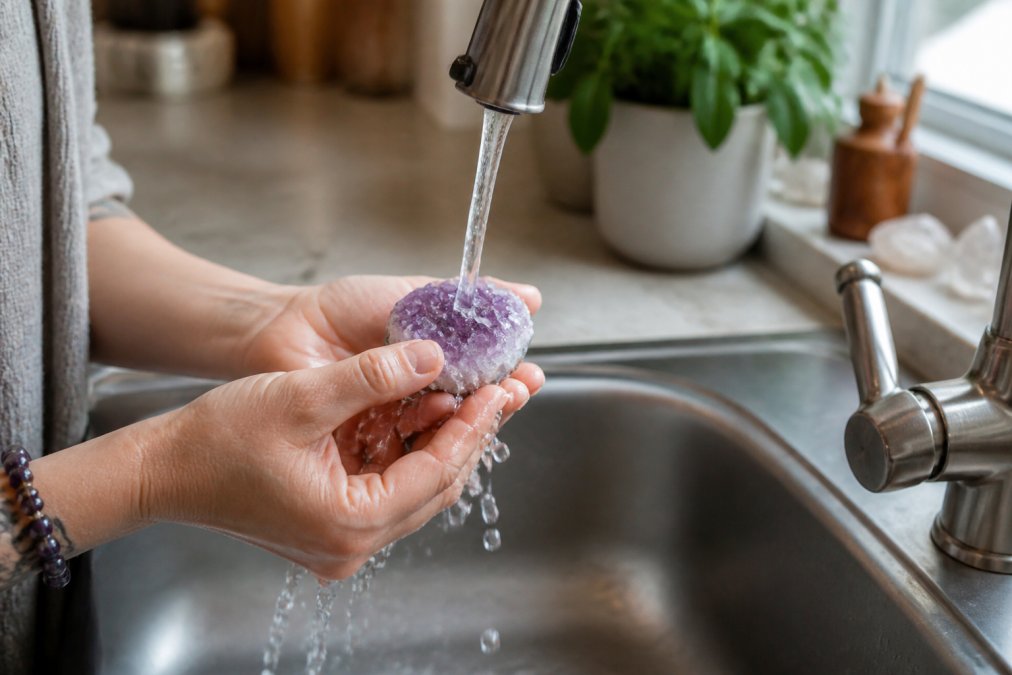
If you have a natural stream nearby, some practitioners prefer it, but tap water works fine for a beginner routine. Intention matters more than the source.
Several popular stones must stay dry. Selenite, halite, and malachite are the classic offenders, alongside any stone with a Mohs rating under 6 or a visibly porous, raw surface. Water can dissolve, crack, or permanently cloud these pieces.
When in doubt, use sound or moonlight instead. You lose nothing by playing it safe.
All-in-One Jewellery Polish & →
Light cleansing is the gentlest option and works for nearly every stone. Sunlight charges with solar energy, while moonlight offers a softer, slower reset. Both are safe for beginners because there is no submersion and no abrasion.
Place your crystals on a windowsill or outdoor surface for a few hours. Sunlight suits clear quartz, citrine, and carnelian. Avoid prolonged direct sun for amethyst, rose quartz, and fluorite, which can fade over time.
Charging crystals under moonlight is best done during the full moon cycle, when lunar energy is at its peak. Place your stones outside or on a windowsill overnight, ideally on a selenite slab, and retrieve them before sunrise. One full night is enough.
To make the most of it:
This method pairs beautifully with manifestation work, since the full moon cycle is associated with release and renewal.
Smoke and sound are the two dry methods that suit every stone, including soft and porous pieces. Pass the crystal through sage or incense smoke for 30 to 60 seconds, or ring a singing bowl or bell beside it and let the resonance do the work.
Smudging with sage is traditional, but the same effect comes from palo santo, frankincense, or cedar incense. Sound cleansing uses vibrational frequency instead of smoke, which suits anyone sensitive to scent. Hold the bowl or bell close to the stone and let the tone fade completely before repeating.
Both methods align with chakra alignment and aura work, since practitioners often cleanse before energy healing. If you are building a crystal grid, cleanse every stone individually first, then arrange the grid.
Salt is a strong cleanser, but it comes with rules that beginners routinely break. The key distinction is between dry salt and salt water, because they behave very differently on stone and metal.
Dry salt works for most hard, non-porous stones. Bury the crystal in a bowl of sea salt for several hours or overnight, then brush it clean with a soft cloth. The salt draws out residue without soaking the stone, which makes it far gentler than a liquid bath.
Salt water is a different proposition. Dissolved salt is abrasive and chemically active, and it damages many minerals and corrodes metal settings. Reserve salt water for tough, non-porous stones only, and even then, rinse and dry the stone thoroughly afterwards so no salt residue remains in crevices.
| Method | Suits | Avoid For |
|---|---|---|
| Dry salt | Hard, non-porous stones | Soft, porous, or metallic stones |
| Salt water | Tough, non-porous stones only | Soft stones, porous stones, jewellery |
Salt accelerates tarnish on any stone containing metal. Pyrite, malachite, and anything with a metallic finish are the classic casualties, because the salt reacts with the surface and leaves permanent pitting or discolouration. Porous stones absorb the salt solution and can discolour from within, which no amount of rinsing will reverse.
Jewellery is the highest-risk case. Salt corrodes gold, silver, and plated settings, and the damage usually shows up weeks later as pitting, dullness, or flaking. If your crystal is set in a pendant, ring, or bracelet, keep the whole piece away from salt entirely, since the metal is as vulnerable as the stone.
When a stone cannot take salt, you lose nothing by switching methods. Sound, smoke, and moonlight all cleanse effectively without any risk to soft, porous, or metal-bearing stones. For jewellery, a dry method protects both the stone and the setting, and the metal can be maintained separately with a dedicated polish.
For jewellery care between cleanses, a dedicated polish keeps settings bright without touching the stone's energetic work. The All-in-One Jewellery Polish & Protection Solution cleans and protects pure silver, pure gold, and platinum in one spray, which suits crystal pendants and rings where the metal needs attention but the stone should stay dry.
All-in-One Jewellery Polish & →

If your stone is a safe candidate, keep the routine simple:
Used this way, salt is a useful occasional method rather than a default. For most beginners, sound, smoke, and moonlight will cover the majority of stones safely, and salt becomes the exception rather than the rule.
Most beginners cleanse too often or not at all. A sensible rhythm is once a month, or after any period of heavy use, emotional intensity, or handling by others. Crystals worn daily benefit from a monthly reset, while display pieces can go longer.
Signs a stone needs cleansing include a dull appearance, a heavy feeling when you hold it, or a sense that it has "gone quiet." Trust those signals over a rigid schedule.
| Situation | Frequency |
|---|---|
| Worn daily | Monthly |
| Used in healing or ritual | After every session |
| Display pieces | Every 2-3 months |
| Newly purchased | Before first use |
| After handling by others | Immediately |
New stones should always be cleansed before use, since they have travelled through many hands before reaching you.
The same handful of errors recur, and each one damages stones that are otherwise easy to care for. Water on soft minerals is the most common, followed by leaving coloured stones in direct sun for days and using salt on anything with a metal setting.
Other frequent slip-ups:
What most guides miss is that stone maintenance is cumulative. Small habits, like drying a stone properly and storing it away from direct light, matter more than any single ritual.
Cleansing crystals is not complicated once you know which method suits which stone. The challenge is slowing down long enough to check hardness and porosity before you act, because the wrong method causes damage that no ritual can undo.
At DP Online Syd, we stock crystal jewellery and giftware with the same care we bring to every piece, backed by a lifetime warranty and free shipping on orders over $100. Our range includes ethically sourced crystal pendants, hallmarked gold and sterling silver chains, and sacred geometry designs, all packaged with care for gifting.
Shop now with DP Online Syd and find a crystal piece worth cleansing for years to come.
Start with a method that suits your stone's hardness. For most tumbled stones and quartz, hold under running water for one to two minutes while setting an intention. For softer stones like selenite or malachite, skip water entirely and use moonlight or sound instead. The first cleanse is mostly about forming the habit, so pick one method, do it thoroughly, and note how the stone feels afterwards.
Avoid submerging water-soluble stones such as selenite, halite, and malachite. Do not leave coloured crystals like amethyst or rose quartz in direct sunlight for long periods, as UV light can fade them. Skip salt water for porous or metal-mounted pieces because salt corrodes settings and leaves residue inside cracks. Never use household chemicals or ultrasonic cleaners on raw or fractured stones.
No. Stones rated below 6 on the Mohs hardness scale, or those with high porosity, can crack, dissolve, or lose their finish in water. Selenite, halite, malachite, and pyrite are common examples. Check each stone's hardness and solubility before submerging it. When in doubt, use moonlight, sound, or smoke, which are safe for every crystal type.
Most beginners do well with a monthly cleanse, ideally timed to the full moon cycle. Cleanse more often if a stone is used daily, sits in a high-traffic area, or has been through something emotionally heavy. Jewellery worn against the skin benefits from a quick cleanse every two to four weeks. There is no fixed rule, so let your routine and the stone's condition guide you.


 is here! Shop now, pay later in 4 easy installments